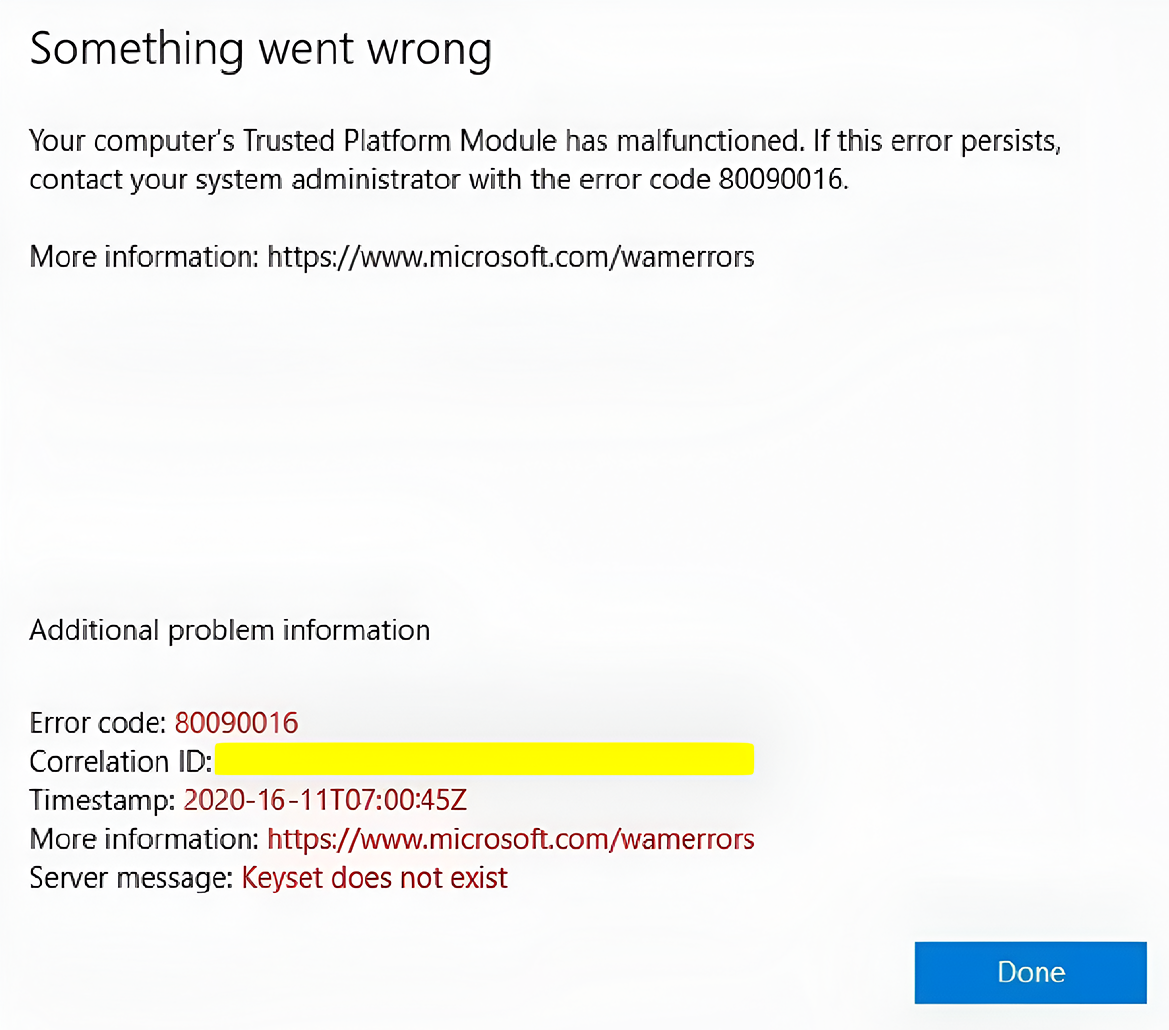
If you are using Microsoft 365 and encounter the error “Keyset does not exist”, don’t panic. This error is usually related to a problem with the Trusted Platform Module (TPM) or a sync issue between your computer and Microsoft entra (Azure AD). In this article, we will show you some possible solutions to fix this error. The solutions are ranked from easy to complex, and have worked for most other users before.
Requirements
The user’s Office 365 account will be required to re-authenticate to Offer 365. If that does not work, you will need access to the computer’s local admin account and a Microsoft Entra (Azure Active Directory) admin account with global administrator or, at a minimum, “User Administrator” and “Cloud Device Administrator“.
These permissions will need to be added by selecting the user who needs the permissions (on the Microsoft 365 admin center), and adding these permissions under “Roles => Manage roles”.
Add the Microsoft 365 account back
Disconnect the user’s work account and then reconnect it using the following 2 sections (this one included). If this solves the problem, no other action will be needed.
- Press “Windows + I” on the keyboard to open the Windows settings
- Or click the Windows menu => All Apps => Settings
- Go to “Accounts”
- “Access work or school”
- Click on the account in question
- Click on “Disconnect” or “Remove”
The account should now disappear from the list and is ready to be added again. Do not add it again from the settings menu, follow the steps below. If you cannot remove the account for some reason, skip the next step and go directly to the section titled “If the account reappears“
Log back into any Microsoft 365 application
To reconnect the Microsoft 365 account to your computer, you can simply open a Microsoft 365 application (Microsoft Teams (Recommended), Outlook, Excel, etc.). Make sure to not select “Log in to this app only” after entering your password. Otherwise the Microsoft 365 account will not get added to your Windows PC.
If the account reappears
If, after trying to remove the Microsoft 365 account in the previous steps, it keeps reappearing, a wordaround will be needed to force a new connection between the computer and Azure. We need to disconnect the user’s Windows account, rename some files to prevent Windows from re-using them the next time we log in, and re-register the device in Azure AD.
It is recommended to make sure you have local admin account credentials and that you are able to modify/delete user devices from Microsoft Entre/Azure AD. Verify step 3 from the section below titled “Re-register the computer in Azure AD“
- Open a Windows session as an administrator à
- Make sure to disconnect the affected user
- Navigate to the directory “C:\Users\<affected user>\AppData\Local\Packages” and remove the folder “Microsoft.AAD.BrokerPlugin_xyz”
- a. It is recommended to put it on the desktop just in case. It can be deleted, renamed or moved
- Restart the computer
- Log in with the user’s account
- Check if the account still exists in the settings (do not add it right away if it is not present (which would be normal))
- Access the Windows Settings with “Windows + I” => Accounts => Access work or school
- Reinstall Microsoft Teams (optionnal, but it seems like it helped in some cases)
- Try to launch Teams and connect the user’s account.
- If requested, do not choose to “log in to this app only” when asked if you want your organization to manage this device. Select “Ok”
- If it works, restart and re-test to confirm. The issue has been known to possibly come back
- If it does not work, move on to the next section “Re-register the computer in Azure AD”
- If requested, do not choose to “log in to this app only” when asked if you want your organization to manage this device. Select “Ok”
If the error is not present anymore, the problem is fixed and there is nothing else to do.
If it reappears or if that didn’t fix it, continue with the steps below.
Re-register the computer in Azure AD
- (re)do steps 1 to 3 of the previous section to remove the user’s work account from the computer. It will not work otherwise.
- Log in as an administrator in Azure AD
- Make sure the administrator account has the permissions mentionned at the start of this article under “Requirements”
- Access the users page and delete the computer account. (If using the provided link, skip the first 3 steps below)
- https://portal.azure.com/#home
- Search and launch “Azure Active Directory”
- Click on the left section “Users”
- Search for the affected user
- Click on the user whose device connection needs to be reset
- Go to the section (on the left) “Devices”
- “Delete” the affected computer by selecting it and clicking “Delete” in the top menu
- Log in on the affected computer with the affected user account, open a command line as administrator and enter the following command to remove the computer account from the Azure AD domain
dsregcmd.exe /debug /leave - Add the work account back in Microsoft Teams
- Try to launch Teams and connect the user’s account.
- If requested, do not choose to “log in to this app only” when asked if you want your organization to manage this device. Select “Ok”
- Microsoft Teams should now be able to launch and the folder mentionned earlier “Microsoft.AAD.BrokerPlugin_xyz” can now be deleted. This is optionnal but a good idea since the file is not useful anymore. It will have been recreated automatically.
If all of those steps have been done correctly and in order, Teams (or any Microsoft 365 app) should start without any issue. “Keyset does not exist” is an annoying one which can be very difficult to troubleshoot.
